Introduction
Cool Record Edit Pro has a wide range of effects that can be applied to your audio file. Over 20 built-in effects and filters are provided to make your music euphonious and unique. This post is going to show you How to Add Audio Effects.
How to Add Audio Effects
Step 1. Input Audio
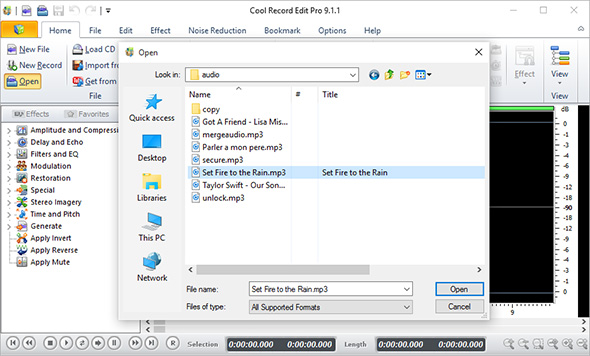
Click “Open” and in the activated window, choose an audio file you want to edit and then click “Open”. You will see the audio file showing in wave form in the program window.

Step 2. Select a Part to Edit
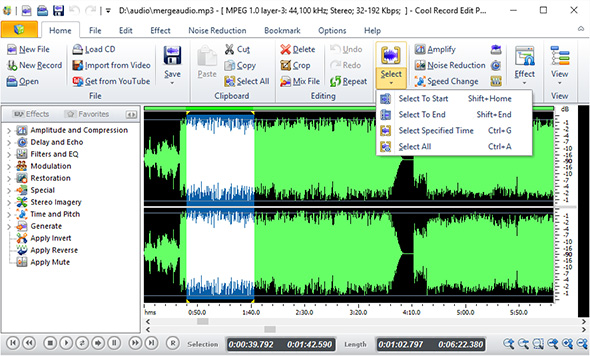
To edit a certain part of the audio, you are allowed to select the audio part in the following ways: click anywhere of the waveform and use hotkeys like Shift+Home, Shift+End or Ctrl+A to select from the beginning position to the current position/the current position to the end/the whole file; left click the waveform and drag along with the waveform to the place as the end; use the sliders below the waveform; input the time of start, end and length.

Step 3. Add Audio Effects
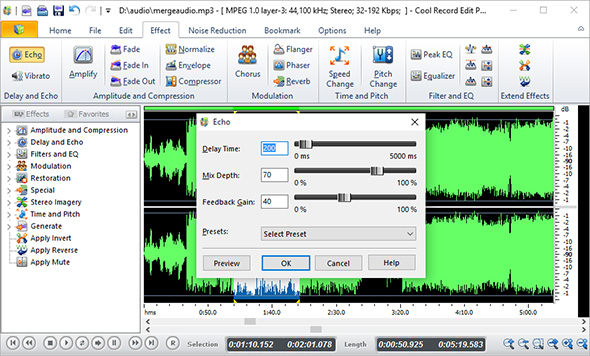
Go to “Effect” tab and there you will find any audio effects you need: echo, vibrato, amplify, fade, chorus, filter and tons of others. Each effect provides detailed parameters and presets to suit either professional or casual needs. With “Preview” function, you can listen to the effect beforehand so as to make sure whether it is what you want or not.

Step 4. Save Changes
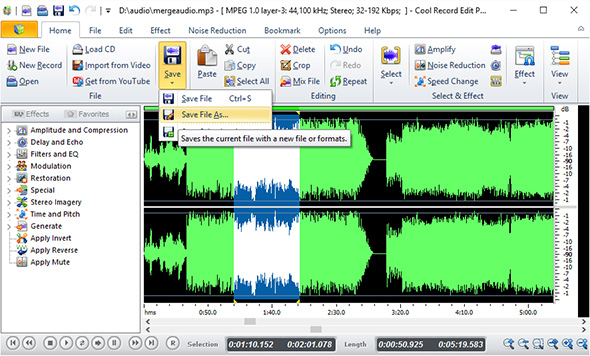
When the editing is complete, you can save the audio by clicking “File” tab – “Save”: “Save File” is to save to the original file; “Save File As” is to save to a specified folder; “Save Selection As” is to save just the edited audio part to a folder specified.

