Introduction
Cool Record Edit Deluxe has a built-in Audio CD Burner to create playable audio CD for those who are music fans and have several GB of songs stored in their hard disk. This tutorial includes the details of How to Burn Audio CD with Cool Record Edit Deluxe.
How to Burn Audio CD
Step 1. Activate Audio CD Burner
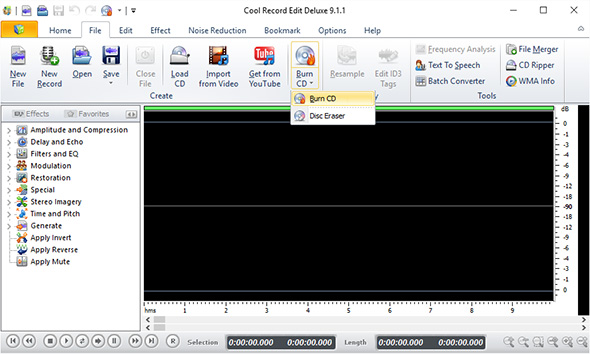
After launching Cool Record Edit Pro, you need to insert a writable CD into your disc drive. Click “File” tab and choose “Burn CD – Burn CD”, then the audio CD burner wizard will be activated.

Step 2. Choose Burning Device
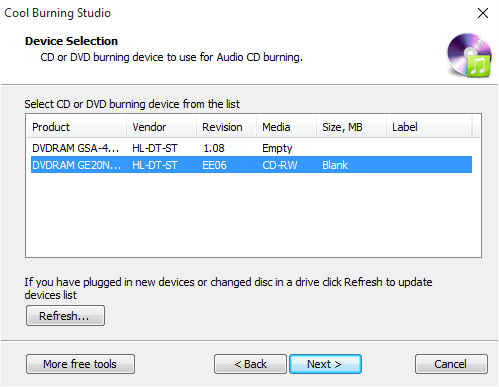
You will see all the available drives displayed in the list and choose the usable one. If new devices are plugged in or some devices are changed, use“Refresh” to update the device list.

Step 3. Input Audio Files
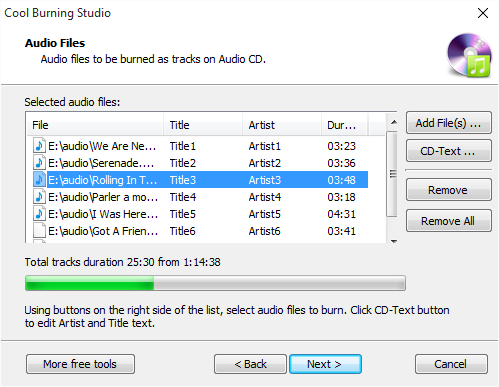
Click “Add File(s)…” to input audio files you like to the burn to audio CD. If needed, you can edit title & artist of every track by “CD-Text…”. To delete files from the burning list, click “Remove”/”Remove All”.

Step 4. Choose Burning Mode & Speed and Start Burning
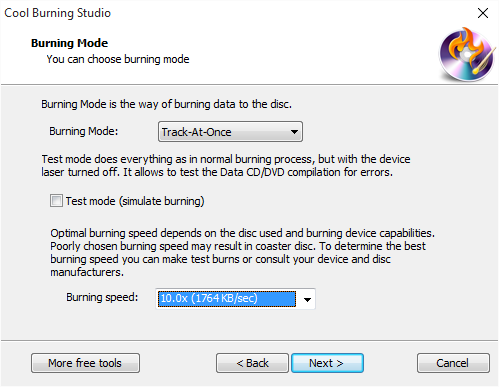
Select one burning mode like Track-AT-Once, Session Track-AT-Once, Disc-AT-Once PQ and Disc-AT-Once raw P-W from the menu of “Burning Mode”. To activate burning for checking errors, you can use the Test mode. After that, choose the proper burning speed. Now, click “Next” to start CD burning and a progress bar will be provided. When the burning process is finished, the disc will be automatically ejected.

